The Blade Tech type, for instance, gives a workable edge in no time flat, but it takes quite a lot of steel off each time, and it's hard to slide the knife edge smoothly through, without judder that leaves ugly corrugations in the edge.
The Lansky system has proved easiest to use and get a really good edge, honed as smooth as you like. But it's a fiddly thing to set up and not very practical to carry with you in the field.

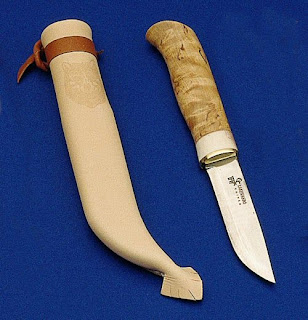
This weekend I decided to sharpen a knife that I've been using recently, and been very impressed with. It's a traditional Lapland type knife, made by Karesuando (I bought mine through Nordica Heat on ebay).
This knife has the typical 'Scandinavian' grind - basically a rectangular section piece of steel, with a primary bevel, then sharpened with a secondary bevel - the diagram below shows this in cross-section (As with all imges in this blog, clicking on the image will bring up a larger version).

With something like a Lansky sharpener, you can reproduce the secondary bevel accurately enough time after time to keep sharpening the knife. But if you want to use a flat stone in the field, the results will be disappointing.
My answer is to grind the knife at the angle of the primary bevel, removing enough 'meat' that the primary bevel becomes the blade edge - as shown in the diagram below.

To do this, you lay the blade on the stone (I used one of Jonny Crockett's 6000/1000 waterstones), so that the primary bevel is flat on the stone. Then push the blade over the stone so that, bit by bit, you 'strike off' the metal down to the dotted line in my diagram. The shape of the finished blade is shown in the diagram below.

It's important to keep each facet nice and flat, and don't let the knife pitch and yaw as you grind it - otherwise you end up rounding-off angles that should be nice and crisp. The trickiest bit is keeping the shape right as you work round the curve and up to the point of the blade.
The end result is a blade that is remarkably sharp (yes, you really can shave with it, especially if you finish it off on a leather strop), and is also easy to maintain in the field with a simple flat stone. Why is it easier to maintain? Because the whole depth of the primary bevel acts as a guide, helping you to keep the knife at the correct angle as you slide it across the stone. It is also a good strong edge, that won't be easily damaged by normal use.
Although you lose a bit of steel in arriving at the new blade shape, it should be possible to re-sharpen it with just a few strokes of the fine grit, so it should wear well from now on.
This knife has done a fine job of preparing a few squirrels and rabbits, and the edge is holding up well - I'll post again to let you know how it goes.
Footnote: For much more detail on knife steels, edge geometry and sharpening, see Chad Ward's Knife Maintenance & Sharpening. Chad is writing mainly about kitchen knives, but it's an excellent introduction to the subject generally.

2 comments:
Thank you very much for this explanation. I just received my Karesuando Boar knife and was a little disappointed that it didn't come razor sharp from the factory (like my Mora's).
Sorry about the previous comment from anonymous, but I just couldn't resist approving it. Spam with a sense of humour - gotta love it!
Post a Comment